Saturday, October 30, 2010

'Tis the season for gift packaging...


And even though this gift is for a retirement party tonight(military retirement,people...we're not that old yet), it gave me all kinds of ideas for Christmas this year. I'm not going to lie. Stenciling this box took a little over an hour, but it was SO worth it. I couldn't find any good masculine looking gift bags that didn't have a fish and tackle on them(how cliche is that?) so I bought some plain 'ole white robe boxes on sale at Hobby Lobby and dug out this SU! stencil I bought a few months ago. I have a total fascination with anything even resembing a medallion. When I bought this, I envisioned using it on a cover for a mini-album(still haven't got around to working on that yet), so I knew it would look awesome all over a gift box.

I used Spiced Marmalade, Vintage Photo, and Tea Dye Tim Holtz distress inks and the applicator and used some stencil tape that wouldn't tear the box as I positioned these. Originally I was just going to do the top of the box, but then I thought it would look really cool if I turned it on end and continued the stencil along all the sides. I started by dabbing the Tea Dye with the applicator all over the stencil, then used Vintage Photo from the center out(but not all the way to the edges) and finished with a little Spiced Marmalade in the very center. I love these autumn colors!


I made the tag using a Cuttlebug cut/emboss/stencil folder I found at Hobby Lobby as well. I had never seen these before and I'm really glad I picked this up. It was super easy to make a really nice detailed tag. There's 5 different tags on it too. It cuts and embosses with one pass and then there's a flap on the back that you lift up, place your tag back in it's place and stencil over the embossed areas if you choose. I used Vintage Photo on the tag and a PTI sentiment stamp with white embossing powder to finish it.

A thick ribbon tied in a knot with a bit of jute cording to attach the tag completes the packaging. If you were using a smaller stencil on a smaller box, it would be a very fast way of making your own unique gift box. I have a small Heidi Swapp damask stencil I can't wait to use now!

You know what this means, right? I'll be scouring the stores looking for cool stencils...

Hope you enjoy the Halloween weekend and save some of that candy for yourself!

Tuesday, October 19, 2010

Babies Babies Everywhere!


Supplies used:October Afternoon papers,PTI felt,Sandylion,Lawn Fawn stamps,PTI,Spellbinders dies,DMC floss,Martha Stewart border punch


It seems like everyone we know is celebrating new arrivals! Here's a little card I made for some good friends of ours that hubby served with in Korea. When I went over to Seoul to visit in September of '06, this couple had just become 'a couple' so it's especially exciting to see how their relationship has grown, attending their wedding 2 years ago and now the birth of their first child. So happy for them!

As you can see, I guess I wanted to play with felt. I think it added a little softness and made me think of swaddling little babies in those receiving blankets. I used a mishmash of stuff on this one, shopping from my stash. I've been reluctantly absent from the papercrafting world for months now while hubby and I are going through the {sometimes horrible} process of having a new house built. Unfortunately for the next 6 weeks or so, it will most likely consume my time and it's definitely consuming the finances, so FINALLY I might actually be forced to use what I've already bought!

I think some craft therapy for stress reduction is in my near future so check back soon...

Thursday, August 12, 2010

A little more Lawn Fawn...


Supplies used: Cosmo Cricket paper,Bazzill,Martha Stewart punches,Spellbinders, Copics,PTI die,Lawn Fawn stamps.


OMG. Did you see the new Lawn Fawn stamps that were released last night?? I am LOVING every single thing they've done so far!!! Good for them--but bad for my pocketbook! I couldn't stop myself. I ordered all three new sets!! And then....I was SO close to the free shipping mark I decided to buy Harold's abcs too! I've been meaning to buy that set so it all worked out.

And the best part about my recent love affair with Lawn Fawn?? I've been actually USING them. {gasp}. I've broken in every set I've purchased so far. Here's a little birthday card for my sister-in-law using Bake me a Cake. You know what I love the most about this particular set (besides the fact it is hands down the best designed boutique-y cake out there)? There's a bazillion different ways to customize your cakes or cupcakes in this one since each little piece is it's own stamp! Very cool and very fun to play with. Sorry if I'm gushing about this little company. I'm so inspired by the way they started up their business just a few months ago, offering an AWESOME product, and they appear to be selling really well!!! It's nice to see somebody realize their dreams--especially in today's economic climate. YAY for them!

Now about the card...I guess I grabbed the wrong sheet of white cardstock laying around when I went to stamp my cake. I very carefully lined up all my little stamps and created this perfect tiered masterpiece, cut it out with my PTI die and then started coloring it in with my Copics. Huh?? What's wrong with these? Why are they bleeding all over the place and making a mess? I still don't know exactly what happened here, but my Copics weren't blending well at all and I suspect I wasn't using the Neenah cardstock. Anyways, I kinda liked how it turned out! I think it almost looks like a watercolor treatment. More importantly, there was NO way I wanted to stamp it and color it all over again because sometimes I'm lazy like that. I wanted a little bit of color on the edge of the scalloped oval and I didn't want to mat it, so I used a Copic along the edge and then gently smudged the edges with the Copic blending pen to soften the look. It was fast and easy and I'm sure a little trick I'll be using a lot.

Our trip to the Smoky Mountains was FAB! Absolutely the best family vacation I think we've ever had. I'll share a few pics from our adventure soon. I've finally started the beach vacation mini-albums and I can't wait to share those on here!

Our summer vacation is over here in Georgia, the kid started his senior year this week, and I'm enjoying all the extra time I'm getting in my scrappy room now that all the excitement is winding down and our normal weekday routine has returned. Hope you're finding time to do the things you love too!!

Tuesday, July 27, 2010

G45 and Lawn Fawn-the perfect pair!


Supplies used:G45 papers,Lawn Fawn stamps,Unity stamp(postcard),PTI label die,MS border punch and border sticker,SU! kraft cs,Primas,Tim Holtz distress ink and ep,Copics,Quickutz Eliza,Bazzill cs,doily and ribbon Hobby Lobby.

So here it is 3 weeks after our beach vacation at the in-laws and I'm just now sending off a little thank you card...better late than never, right?

I had a lot of fun with this! I bought a couple Graphic45 On the Boardwalk 8x8 pads to make mini-albums of our reunion for the family and thought I'd start out using it on this little card. It just so happens Lawn Fawn's new release this month (Swimsuit Season) features fun vintage swimsuits that were perfect for this! I love the style of their stamps. There's a little quirky fun vibe to them that just makes me happy!

Even with 2 of those 8x8 pads, I had to be sparing with these gorgeous papers since my mini-albums are going to use nearly every inch of them. I got a little inventive and used the back cover of one of the pads for the card front (the striped paper). Nothing's going to waste with these! Graphic45 is a new endeavor for me. I've always loved their papers and been in awe of those who know what to do with them, so I started studying the G45 gallery and their ning site. If you're a G45 lover or a lover of all things vintage, you HAVE to go check it out HERE! I'm planning on becoming a member and hopefully uploading this card soon.

I always write these ridiculously long blog posts so I'm sure I've lost most of you by now, but I wanted to share a few more details about the card. The flower is a bunch of paper Primas I've had laying around for years and I recently ran across THIS tutorial on breathing new life into them. Mine doesn't look nearly as good as hers, but it sure made those Primas look better than they did! I used Tim Holtz distress embossing powders on the postcard image. Not sure yet whether I like them or not. Let's just say they're 'different'. And--I got them really cheap on sale. Probably a good thing.

I've got a few pics from the vaca to share. I've got them all printed out now and I'm just about ready to start the minis. I'm so excited!

My in-laws beach house


The canal in their backyard


My crazy and totally fun sister-in-law Annie(Bloody Mary virgin no longer!)


My cutie-patootie kiddo


Me and my father-in-law


Bethany Beach,DE


My hottie hubby


Time to wrap this up. But first, I'll be MIA again for the next week while hubby and I take our son on a crazy thrill-seeking mini-vaca to the mountains. What else do you do with a 17 yr old kid?? I'm pretty sure that between whitewater rafting, ziplines, and bungee-jumping I'm gonna be pretty much done with thrills for awhile.

Enjoy your week!

Monday, July 19, 2010

Shopping for babies is SO fun!!


Supplies used:SU! brass template,stamp,BG papers,Michaels ribbon,KI Memories Sheer Delights,PTI felt,canvas,Spellbinders labels and scalloped square,Bazzill cs,DMC floss,Martha Stewart border punch,Copic marker.

Well, not fun enough that I want one or anything. My 'baby' will be a senior in high school this year and the only babies we better have in this house in the future are grandbabies! (and that better be a good long while!!) That's probably why I enjoy shopping for them so much though--I can hand over all that cuteness with no diaper changes or late-night feedings attached;)

So one of hubby's coworkers just had a little baby girl and if there's one thing I haven't had enough of in my life it's shopping for BABY GIRLS!!! Sadly, the stores had a really disgustingly sparse selection of cute baby girl clothes. Boy clothes cuteness was EVERYWHERE but I guess marketers think parents of baby girls want to dress them in drab colors like tans and army olive drab greens. I'm not kidding. This is what I saw this past weekend in 3 baby stores.Yuck. Leave it to the hubster though to score this adorable set of onesies and this little PINK sleeper on the clearance rack of all places!! Now I wasn't looking to go cheap or anything, but hey--who am I to argue with all that cuteness for under $10??


Of course, the best part about giving baby gifts is making the card and packaging! For the card I took a page straight from PTI's Nicole Heady on her post here. Just scroll down a little to find the felt ducky card. I loved the way she used felt to create comfy snuggly softness. I chose to use some canvas behind the little bear. And speaking of bears--he was created using a really old SU! brass template that I hunted and hunted for a few years back and bought from an ebay seller in Singapore. I don't normally buy from overseas sellers so that tells you how BAD I wanted that! He's been put to good use!


I traced him with a Copic E57 marker on SEI velvet paper. He's fuzzy and has that watercolored and drawn-by-a-child look about him. Do you recognize the papers? Probably not because you don't immediately think 'baby' when you think of BG's Capella line. I think they worked beautifully here and goes to show that thinking outside the box can yield great results! I finished the card off with a little $ ribbon from Michael's ( I really wish I would've picked up several spools of this since it's long gone and I LOVE it) and a scalloped edge of a KI Memories Sheer Delights sheet (another thing I really wish I would've bought more of and now it's discontinued).


I added some hand-stitching to the bag using the Tim Holtz ruler to punch the holes in an alternating pattern and some DMC floss. I wanted a thicker look to the stitching so I used a full 6 strand piece of floss and stitched for a good half-hour on this instead of whipping out the sewing machine. Crazy? Maybe. But hubby delivered the gift at the office in Baltimore today and he said the "ooohs and ahhhhs" were outta control! It's those little details, I tell you.

Hope you're finding time this week to do something crafty! I'm off to work on a beachy thank you card for my in-laws using some C.U.T.E. new Lawn Fawn stamps. Hope to share it soon!!

Sunday, June 27, 2010

Using your stash feels good!


This is the first time I've used any of this BG Archaic. It's perfect for reptile pics. This little guy just appeared on our patio one morning last summer. He was SO cute! BUT--I kept my distance. Turtles can be vicious. I know this from experience. They may be slow(and actually this one moved out pretty fast) but they can bite HARD. We just left him alone(after I made sure to take his mugshot) and he hung out all day and was gone the next morning. We had one show up like this in our backyard in El Paso and we kept him for a few days as a "pet". Yeah. That didn't work out so well. Our freshly sodded yard was torn up and half eaten before we had to kick him out. We released him in the desert behind our street and do you know he showed up in my parent's backyard later on that summer? They lived 5 blocks away. How did we know it was the same one, you ask? He had a red sunburst painted on the top of his shell. Guess somebody decided they didn't want him as a pet after all. He lived in their cul-de-sac moving between the yards for a few years up until we all moved here to Georgia. Wonder if he's still there?

Just a couple things I thought I'd share about the techniques on this one: the little turtle shells lined up at the top are a Quickutz die( part of a rose, I think) that I die-cut from a piece of thick velvet cardstock. I ran them through a cuttlebug embossing folder (the mesh one) and then took a black marker and colored in around the raised spots and along the edge. The funky little extra under my title was just me messing around with a Spellbinders edge die. I die-cut the edge once on a piece of cardstock and then turned it around and ran it through again to make a shape. I had to trim some of the edges to clean it up a little, but I thought it turned out kinda cool. Reminded me of something reptilian. My brain works in weird ways.

There's no rhyme or reason to what I'm choosing to scrap these days. I had these pics laying around in the same place with those Army formal pics. I did up kits for both layouts a few years back so I just decided to finally finish them. That felt good! So did using some of my older stash. I might try making up more kits in the future when I don't have a lot of time to scrap but I want to get SOMETHING accomplished.

I have a major dilemma going on with digital photo organization and trying to figure out what to scrap next. I want to work with some of my more current pics which requires me to edit them and print them off. I'm just being lazy about it. I read a good article by Stacey Julian in the new issue of Scrapbook and Cards Today. You can check out the issue here. It's a FREE download and has some serious eye-candy in there! She has a 3 part series on tackling your digi pics and it couldn't have come at a better time for me. I'm going to take her 15 minute timer idea and get started this week.

I might try to work on a card or two this week, possibly a layout, but we're leaving in a few days for my in-laws beach house in Delaware so I'll be MIA for a week or so. It's our annual family reunion and there's 15 of us staying in their house! It's ginormous though so it's always a fun time--fireworks on the boardwalk, kayaking in the canal, and bodysurfing at the beach WOOHOO!! Hope everyone's enjoying summer and able to get out there and make some memories!


Supplies used: BasicGrey paper,PTI paper(lined notebook),Perfectly Clear stamps,Cuttlebug embossing folder,EK Success border punches, Quickutz dies,Spellbinders dies,Bazzill,Ranger distress inks.

Friday, June 25, 2010

A little more PTI love...


This is a quick one I whipped up yesterday for my Dad who always seems to be traveling on Father's Day so I end up forgetting to make him a card. My folks arrived back in town and I had a gift all packaged up for him but no card. My Mom guilted me into making one at the last minute. Something along the lines of "you have all those supplies and you couldn't make one little card??" I believe was how it went down.

If it looks vaguely familiar--ok, REALLY familiar--it's because I had an extra balloon all colored in from the OWH bloghop a few weeks ago and I needed this thing FAST. I just stamped and diecut a few more balloons and clouds and sticking with the same color scheme, I used some more of that OA paper and some PTI paper. I suffer from the same aversion to masculine cards that so many others seem to have. It's not that I don't like them when they're finished--it's the getting to the finished part that I HATE. These stamps turned out to be a really good investment. He loved the card and even commented on how cool the balloons were! I guess you'd just have to know my Dad to fully appreciate the comment. He's not one to gush about a handmade card so---

this year's balloons=good
last year's horse=not so much

I've received nearly all my scrappy purchases in the mail this week. I had a real moment there last night where I felt a little sick to my stomach looking at the pile of new stuff. I admitted this to hubby and his reply was "what? hoarding getting you down??". Nice. I guess I just have to get working on some projects and work my way through the stash. I've got a good start on it this week! I'm finishing up another layout that I'll hopefully be able to post this weekend. Two in one week? Now THAT'S crazy talk.


Supplies used:PTI stamps,dies,felt,paper,SU stamp,punch,Copics,Martha Stewart punch,OA paper,Memento ink,Ranger Distress ink.

Monday, June 21, 2010

{GASP}...Could it be?!?


Supplies used:
K&Co and BG papers,Cuttlebug embossing folder, SEI velvet paper,Tim Holtz distress ink and die,Prima flowers and beads, Creative Imaginations clear label, Tsukineko white gel roller,Sizzix die,Quickutz dies,DMC crochet thread,Martha Stewart punches.


A scrapbook layout?!? That's crazy talk. I can't believe how long it's been since I've actually scrapbooked. I love, love, love card-making, but I've really missed working with my photos too.

I've had this layout in the works for about 2 years now. I know how that sounds but no, it wasn't laying on my scrap table for 2 years. I chose the K&Co papers back then and had the pics printed, but never went any farther until this past weekend. I'm really really happy with this one. I tried my hand at a little distressing. I've bought nearly every color of Tim Holtz distress ink and I LOVE it! I have a few tips to share with you with regards to these distress inks, the first being the best little tool you can use with these is the Tim Holtz distress ink applicator tool with the sponge refill pads!
It's a good idea to go ahead and find it in your budget to buy enough refill pads for each ink pad you own. I only have one applicator handle as I really didn't want to spend the money on a bunch of them with the handle caddy(though it looks really cool and would be SO much easier to use than my method but I digress....) I found it's easy enough to switch out the velcro pads when working with different colors of ink. I bought these small clear baggies at Michael's a few years ago and they work perfectly to store the pads when not in use. I just slapped a label on each bag and I sit them upright in a basket that holds my inkpads.I also really recommend the Ranger craft sheet(or any comparable craft sheet) when working with these inks. It's made blending a breeze and saved the top of my craft table.


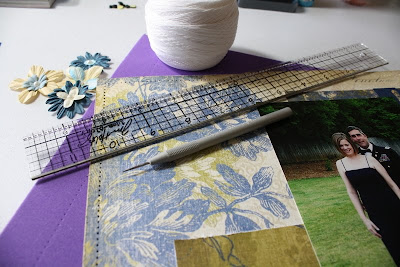
And since I'm on a Tim Holtz kick here lately, I bought the ruler with the paper piercing edge which is what I used to stitch on my layout. It's super easy to line it up and pierce along the sides and gave me the option of using a bit thicker crochet thread and a cross-stitch needle to sew. I used a backstitch(for all you cross-stitchers out there) and while it took me a bit of time to complete, I really think the end result was worth it. If you're like me, sometimes I make mistakes with my sewing machine and it's been known to jam and rip the paper. This was the only sheet of this paper I had so there was no room for mechanical error today. It'll be so easy to use that ruler to add quick stitching on a card!


I used a few new goodies on this one. The label under the title is one of the new Tim Holtz dies and the edge peeking out from the large photo is a new Sizzix frame die that I just tucked up underneath. And of course, I had to incorporate some of my Martha punches. I wasn't sure about those rain drop punches that I used for the border of the page at first, but now I'm so glad I held onto them. I think they were just the right touch for a military themed layout--not too frou-frou if you know what I mean?

I've been pretty bad the last week and ended up ordering MORE stuff online. I just got my PTI order in the mail today and a few other small packages are filtering in. It's ok though. My mojo appears to be back and I'm ready to play!
I'm off to work on a few more scrappy things. Hope your week's a great one!

Tuesday, June 8, 2010

Ah....Heaven....


Here's those obnoxious stash addition pics I promised. Now do you see what I mean about buying WAY too many of those new Tim Holtz dies?? They are HUGE.Before this shopping expedition, I only owned one of those giant Sizzix dies and it had it's own little storage place. Now? I'm in trouble here. I couldn't resist though once I saw them in person. I can't wait to use those edge dies on some cards.

I also picked up a few of his new embossing folders. I didn't like them so much when I saw them online, but again once I saw them in person I was imagining the possibilities...

I tried not to go too crazy with paper(well, single sheets of paper). Paper pads on the other hand?? I can't get enough of them! Here's a nasty little confession for you---I bought a second pad of each of those new October Afternoon papers. I'm already using them a ton and every serious papercrafter knows--once they're gone, they're gone. Gotta get 'em while you can, right?

I think I got a pretty nice assortment of goodies. They should keep me busy for awhile. My hubby had to turn around and go back up to Baltimore unexpectedly a few days after we got home and he called last night asking if I needed anything else from the stores up there! Um....yeah..... um....not really, but since you asked....I really want one more of those Tim Holtz dies...

My guy's a keeper, for sure! (and I think I'm loving all the consolation prizes I'm winning for all the unexpected business travel)

I only had time to take a few quick pics of the stash today, no scrappy play time for me, but tomorrow is wide open! Can't wait!

Monday, June 7, 2010

Just For You


Supplies used:Cosmo Cricket papers,Spellbinders,Quickutz Moxie skinnimini and leaf,SU cardstock,linen thread and stamps,PTI felt,MM button, DMC crochet thread #3.


Ok, really it's just for Paula....shhhhhhhhh.......don't tell her. (hopefully she won't see this post before she gets her package this week!) On second thought, hopefully she does read this so she knows to be looking for a kraft envelope in that cardboard box. It kinda blends in with the side of the box and could easily be pitched. That would be sad. Especially since I struggled for hours on that crochet flower! (just kidding)

I had a real crisis situation in the scrappy room this morning. There were bags and bags of stuff waiting to be lovingly fondled all over my table and I had no place to work on this card. I had to rush the whole process and unpack the bags. I hate that. I didn't give each little goodie the attention it so deserves. I just had to pile everything up in a corner and make promises to get back to it later.

I'm thinking about lining everything up for a photo shoot. I HAVE to share all my scrappy finds from last week! This is the problem with having absolutely no LSS in your town. When you finally get to shop at one, you totally blow your budget and throw caution (and any extra space you may have had left in your house) to the wind. I seriously have no idea where I'm going to put this stuff.

That's it--I'll have to share a pic tomorrow and you'll see why space is an issue. I went a little overboard on a certain something(or somethings) that are just ridiculously huge. And before you go thinking I went and bought 15 Cricut E's and a couple Silhouettes....I'm exaggerating. But still, they're beastly huge for the purpose they serve. Granted, it's a divine purpose.

Hope your week's off to a great start! I plan on being very scrappy this week...

Saturday, June 5, 2010

And the OWH Bloghop winner is......

PAULA(May 29,9:49am)!!!

And Paula, you can thank the Boston Red Sox for your prize!

I just have to share real quick my cute(well, I think it is anyways) method of choosing a winner. Yep, sure--I could use the random number generator and I've done that in the past, nothing wrong with that, but this time I was gonna be a lot more 'hands-on' and write each name with the date and time on a little slip of paper and pull from a hat(probably an old black beret laying around here somewhere). Well, you guys really blew me away with all the awesome comments! I never thought I'd have 136 of them!! Long story short here--I just got back from my roadtrip to Baltimore and I was tired and there was no way I was gonna stick with my original plan so I asked hubby to choose a number between 1 and 136.

What do you think a total and complete Red Sox fanatic is gonna do?? Yep. You guessed it. Josh Beckett chose our winner.

So Paula, you're #19 and the lucky winner!

Take note my friends, for future bloghops.....you might want to know all the Red Sox jersey #'s and time the placement of your comments accordingly....heehee...

Thank you all again SO much for taking part in the hop and for all of your truly wonderful comments! You guys are the best!

Monday, May 31, 2010

In Remembrance...


I had the rare opportunity today to visit Arlington as my hubby and I were driving up to Baltimore for a few days this week. I've always wanted to visit on Memorial Day. It was the perfect ending to this holiday weekend of remembrance and a truly wonderful time hopping in the OWH Memorial Day Bloghop.

I just want to say a big THANK YOU for everyone who visited my blog over the weekend. All of the sweet comments, the new followers, and the outpouring of support for our military all throughout the bloghop was just amazing! It was a really special weekend that I hated to see come to an end. I can't wait for next year's!

I'll be up here for a couple days dropping in at my favorite LSS and shamelessly shopping for more stash. I love tagging along on his business trips now that all of our LSS's in town have closed. I can't wait to get back though and play with some new stuff. You guys have totally motivated me to post more and start producing!

It's late here and this chickie needs to get some sleep and get ready for a big day of shopping ahead. Hope everyone had a safe and enjoyable weekend!

Saturday, May 29, 2010

OWH Memorial Day Bloghop!!


Welcome to your next stop on the OWH Memorial Day Bloghop! You should be arriving from Megan's blog, but if you've just dropped in for a visit and feel like starting from the beginning and checking out some amazing talent for a great cause, be sure to start HERE at the Operation Write Home Stars and Stamps blog for the start of the hop!

Supplies used:October Afternoon papers,SU! stamp,ink,ribbon,brad and linen thread,DMC floss, EK Success border punch and label punch,Making Memories buttons,PTI stamp.

I used this week's MOJO140 sketch for my first card in today's hop. I'm SO lovin' the new October Afternoon Thrift Shop papers and they absolutely fit perfectly with the red,white, and blue Memorial Day theme so it was a win-win! I'm still on the vintage kick right now and I ran across this post from last summer on Nichole Heady's blog with excellent instructions on how to make your own crochet flowers. It's SUPER easy to make these! Trust me, I've never crocheted a day in my life before now. If you need a few crochet basics videos to get you started,I found these to be really good.


Supplies used:PTI stamps,felt,cloud and balloon dies,Copics,Pink Paislee papers,MS border punch,Spellbinders tag and label die,jute ribbon Joann's, Stampendous ep,Making Memories buttons.


For my second card, I couldn't wait to play with some new PTI goodies I got in the mail this week just in time for this hop! How 'bout those too-cute for-words clouds?? Those are their new cloud dies cut from their Vintage Cream felt. I'm loving all the hot air balloons and clouds showing up in the papercrafting world these days. I saw this stamp set and knew I had to have it. All throughout the year we see hot air balloons flying over our house. We've even had one land in the middle of our street for emergency refueling! Of course, I was out there with my camera! I have lots of uses for these stamps and the matching dies. Keeping with the red,white,and blue theme, I found these Pink Paislee Cupid papers in my stash and they reminded me of summer, picnic tables, and fun. I hope it brightens the day of a family member of one of our bravest!


Arlington National Cemetery

And speaking of family members of our heroes, this Memorial Day and each and every day, I'm thankful for our patriots who put their lives in harms way defending freedom and this great country of ours, for their families who wait so patiently back at home holding down the fort, and for those who have given the ultimate sacrifice for their country so that future generations will be free to follow their dreams. God bless our military!

I hope everyone has a wonderful holiday weekend, but before you leave and hopefully continue on with this awesome bloghop, I have a little BLOG CANDY to give away!! I was having a tough time deciding exactly which of these cute little elements on these cards would be the most fun to receive in the mail SO...... I'm sending them all!!


I have 1 set of red, white, and blue crocheted flowers(one each)
I have 2 sets of the PTI die-cut clouds cut from PTI Vintage Cream felt(4 total,these are die-cuts--not the dies themselves)
I also have 2 sets of the PTI die-cut/stamped balloons (6 total, these are die-cuts--not the dies themselves and they are stamped in Memento ink suitable for Copics)
and what's a Martha Stewart border punch addict to do but give away the Martha Stewart 'Quilted' border punch I used along the bottom of my second card! (the actual punch itself except you'll be getting a new unopened punch because this addict NEVER gives away her Martha punches)

All you have to do to be entered to win this blog candy is leave a comment here on my bloghop post! There's a whole bunch of blogs to get through on the hop this weekend so relax, take your time, just be sure to comment here before 5pm on Friday June 4th,2010 to be entered in this giveaway!! I'll be drawing the winning name/date/time stamp from a hat and announcing the winner Saturday morning June 5th on my blog as well as contacting the winner via email. (Please, if you're leaving a comment outside of a Google account, leave your email addy with the dot com spelled out as I've done here so I can contact you) Sorry my international friends, but I'm limiting this contest to US shipping only.

Thanks so much for visiting my blog today and taking part in this hop! I hope you have a safe and FABULOUS weekend and be sure to visit the next stop on the OWH Memorial Day bloghop, a military spouse herself, Erika's blog HERE featuring her cute and fun patriotic card!

Tuesday, May 25, 2010

Just a quick note...

I've been busy, busy, busy this week getting ready for the OWH Memorial Day bloghop this Saturday May 29th,2010!! Please come back and visit this weekend--I have a CUTE CUTE CUTE blog candy giveaway planned and you won't want to miss this AMAZING bloghop! There are over 135 talented paper-crafters participating in this hop--SO much inspiration and SO many many generous people giving their time and creative energies to such a great cause! Hope to see you back here on Saturday!!

(the hop will start HERE at the OWH Stars and Stamps blog, but you're welcome to start with mine and work your way back and forwards from here!)

Sunday, May 9, 2010

Happy Mother's Day all you moms out there!


I'm typing up this post as I wait for my wonderful hubby to get back from Panera with my all-time favorite muffin EVER--the orange cranberry. I really hope they have it this morning. I needed one more Mother's Day card for my mom(the other one was for my mother-in-law who enjoys all things crafty/sewing, etc.) and these PTI stamps were just the thing. I just so happened to buy her a Wallflowers starter kit and a bunch of sweet pea refills(my favorite scent) from Bath and Body Works as a little Mother's Day gift this year. She's way too cheap to indulge in what she calls 'such an expensive air freshener' so I popped in the store the other day and guess what?? They were on surprise sale for $6!! I bought her enough refills to last until they go on sale again as it will probably be me that buys her more.

Anyways, on to the card... I pretty much CASE'd the uber-talented Dawn McVey's card here. I loved the way she used the Dotti Biscotti paper, Copics, and pop-dots to enhance the blossoms but I wanted to take that idea and put my own spin on it. I found out it's MUCH harder to do that than I thought. When you have a picture of an already perfect card in your head, it's difficult to alter it in any way. I gave it my best shot and I'm super excited with how it turned out. Hope my mom likes it. She's REALLY hard to please. Probably why I grew up such a perfectionist:)

If you're celebrating Mother's Day as a mom yourself, or with your own mom, or someone you consider just like a mom, I hope you have a wonderful day and cherish the relationships in your life!

Supplies used:PTI stamps and patterned paper,Copics,SU! Kraft cs,EK Success double crochet lace border punch and bracket journaling punch,Quickutz label,Tim Holtz Vintage Market alpha.

Friday, May 7, 2010

An attempt at vintage...


Well, I don't know if this could really be called 'vintage-style', but I had fun using all these fun new vintage-y products! Got some of that awesome new October Afternoon paper and I found this cute dressform stamp at Hobby Lobby last week. I ordered a REALLY cute stamp set from a new company called Lawn Fawn , but it hasn't arrived in my mailbox yet and I REALLY REALLY wanted to play with this new paper! (and I really really needed to get a mother's day card made and sent out in a hurry)

Never been much of a vintage kinda girl, but I'm totally and completely embracing this new trend this season! I'm working on a little mini-album of vintage goodness that I'll hopefully finish up next week and share here.

Hope everyone's enjoying gorgeous spring days and squeezing in some scrappy time too!

Supplies used:October Afternoon Thrift Shop,K&Co,SU! patterned paper,Quickutz Eliza,Tim Holtz Vintage Market,Stampabilities and Inkadinkado stamps,Spellbinders,EK Success real estate punch,Martha Stewart modern garland and eyelet lace punch,Tsukineko and SU! ink,La Mode button,Michaels ribbon,SU! kraft cs,Prima,KI sheer, Copics.

Monday, April 19, 2010

Stella ROCKS!


I'm constantly getting requests to make funny birthday cards and I've always struggled with it--BUT NOT ANYMORE!! My search is over! I just couldn't find stamped images that were witty,age-appropriate,and relatively inexpensive.THEN....I discovered digi stamps and a whole new world opened up....One of my favorite digi stamp sites so far is Bugaboo Stamps. This character 'Stella' is just perfect! Jodie over at Bugaboo has such mad skills as a designer and there's even a FREEBIE digi stamp every Friday(this Stella one that I used was a freebie!!)

I had SO much fun coloring her in with my new Copics! One of the things I love the most about these Stella images are the little phrases that come with the stamp. Too, too funny and it totally eliminates having to come up with something witty yourself--the hard part is done for you!

I was also asked to make a matching bucket tote to go along with this card so this is what I came up with. I love making these little bags! They're so fast and easy to create and perfect to give just a little something special.

These are the Copics I used on the image. I'm self-taught so cut me a little slack.please? The nearest store offering Copic classes is an hour away and doesn't seem to teach more than one class a month so maybe someday in the future I'll get there.


I'm absolutely loving sketches right now. I think they're just a great jumping off point to get the mojo flowing and I know on this card, it really made me think outside the box. I LOVE the long skinny card! This sketch is on p.33 of the new 'Go To Sketches' PaperCrafts mag. If you don't have this one and you're into making cards, you've gotta check it out! One of the best publications I've seen in a long time.

TONS of ideas running through my head now so I'm off to the stores to pick up a few 'necessary' (not so much) crafty items. Here's hoping you have a happy productive week!

Supplies used~QK damask dies,Santa's Workshop,Lemonade,Spellbinders tags,labels,AC ribbon,Bugaboo digi stamp,K&Co paper,DCWV cs,Copics,SU tag punch,MS border punch, SU stamp,StudioG stamp.